FREQUENTLY ASKED QUESTIONS
Zebra-TLP-2844
STEP 1: Download the Setup Utility
- Download the Zebra Setup Utility from the following link: https://www.zebra.com/us/en/support-downloads/desktop/tlp-2844-z.html
- Scroll down to the DRIVERS section and ZebraDesigner driver 32/64 bit download. (IMG A & B)
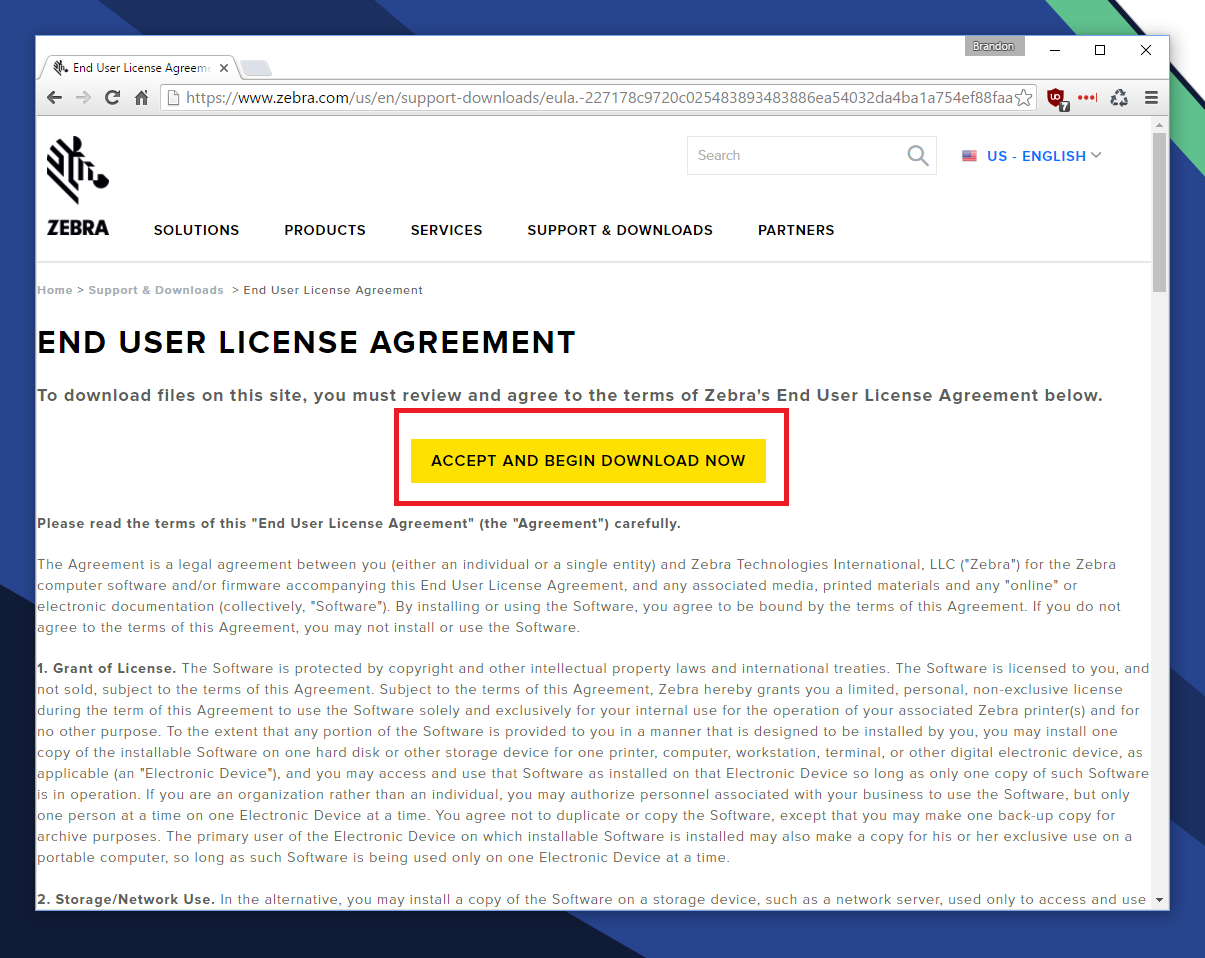
- Click ACCEPT AND BEGIN DOWNLOAD NOW. (IMG C)


STEP 2: Install the Setup Utility
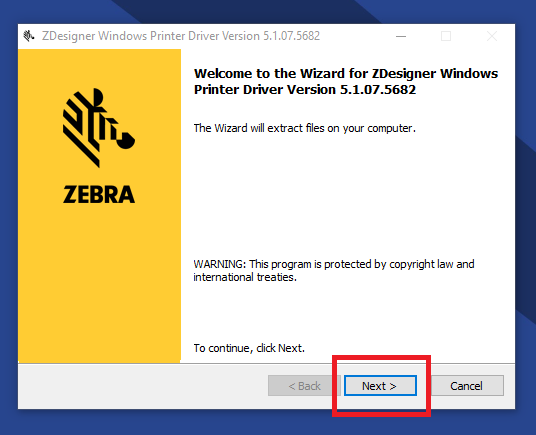
- Run the download application.
- Click Next to extract the files.
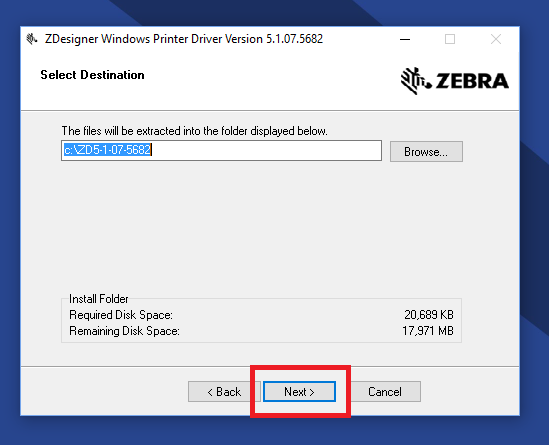
- Leave the default extract directory and click Next.
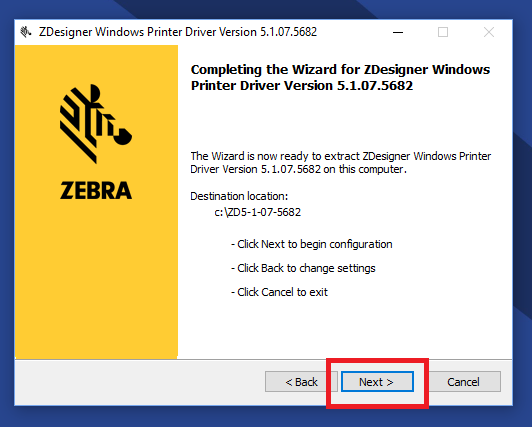
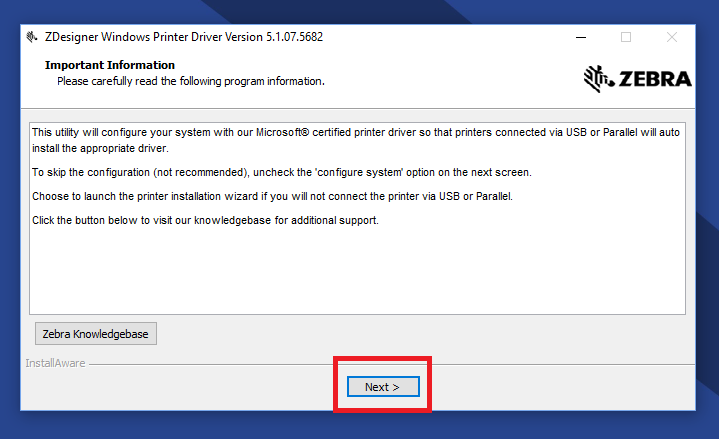
- Click Next to begin the installation process.
- Click Next to agree to the terms.
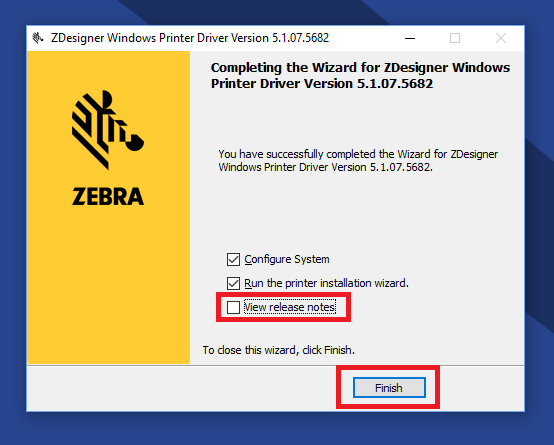
- Uncheck the option for View Release Notes and click Finish.
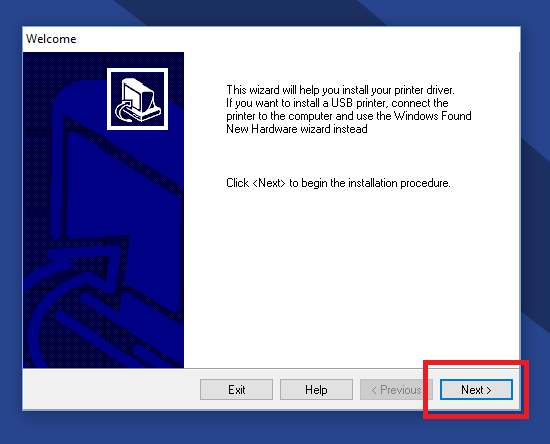
- Click Next again.
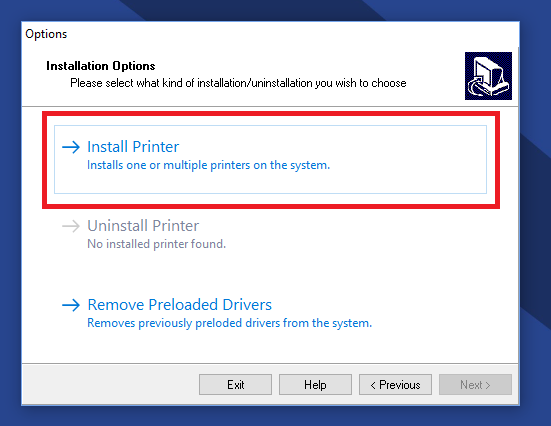
- Click the button for Install Printer.
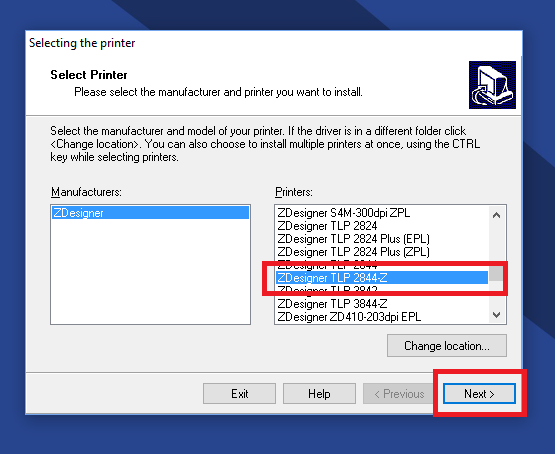
- Select the appropriate printer from the list on the right hand side, then click Next.
- If your printer is plugged in via USB, select the USB option available from the list of ports, then click Next.
- Uncheck Launch installation of Zebra Font Downloader Setup Wizard, then click Finish.
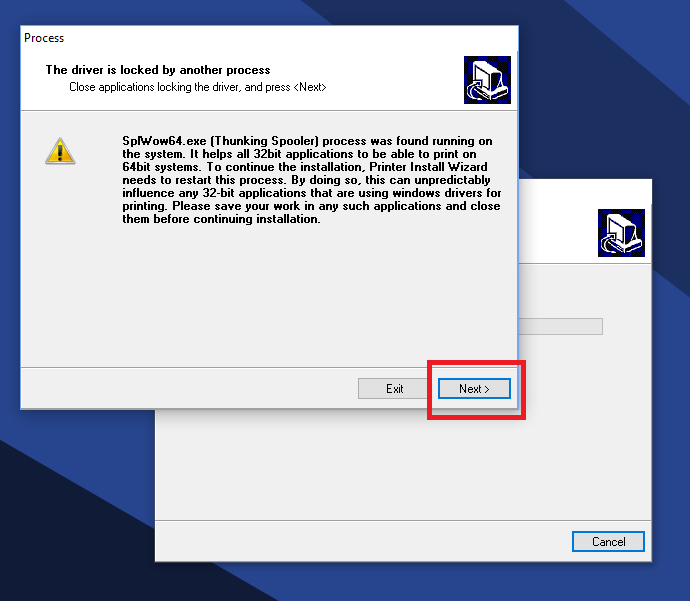
- If you receive a prompt saying the driver is locked by another process, click Next.


STEP 3: Configure Printer Driver
- Open Control Panel on your computer.
- Depending on your version of Windows, select View Devices and Printers, or double click the icon for Printers (Windows XP).
- Find the Zebra printer in the list (Should be labeled ZDesigner), right click on the printer icon and select Printing Preferences.
- Most Zebra's require you to select the option for "Rotate 180°", check this option and select your level of Darkness above it, usually set this to 15.
Read 707 times
STEP 4: Configure DigitalRx
- Open DigitalRx
- At the top of the screen, select the drop down menu for Maintenance, then Store Setup, then Store Profile.
- Click the Printers Setup tab along the top
- Under the Rx-Label Printer option, select your ZDesigner printer from the drop down list to the right.
- To the right of Label Type, chang ethe Paper Size to PAPER_CUSTOM, and then Save.